

How To Remove Window And Replace With Wall
Jim Petrucci had a problem: Also many windows. A homeowner in Hartland, Michigan, Petrucci had plans for a new plant nursery, only he felt that the room he had in mind was overexposed to the elements.
"There were really two windows in that room," says Petrucci, "and it was just manner too common cold in the winter. And according to the code requirements for the surface area, 1 of the windows was likewise pocket-sized to exist the only window in a bedchamber. We had to take 1 of them out, so we removed the window that didn't run across code."
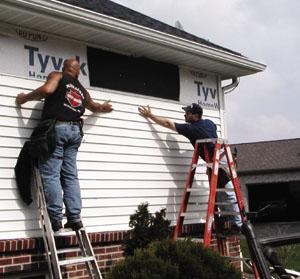
Petrucci enlisted the assistance of a couple of friends, and over the course of a weekend they completed the remodeling job, creating a warm and welcoming location for the new plant nursery.
Deleting a Window
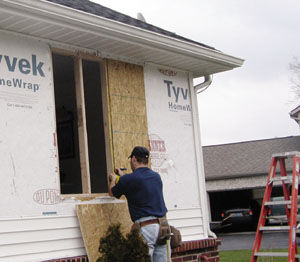
The kickoff stride in removing a window is to use a hammer and pry bar to remove the interior window trim. And so remove any outside trim that is installed over the siding (or any other exterior wall roofing).
Next, remove the exterior siding, starting with the J-runway along the top of the wall. It is fairly easy to remove vinyl siding. A zip tool — available from your local supplier — unlocks and later relocks the lesser of a panel and then you can go at the nailing flange beneath.
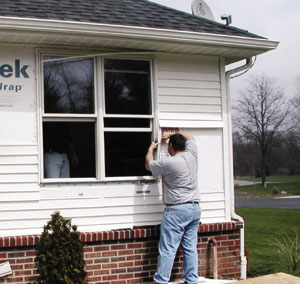
In one case the siding is out of the way, you can remove the window. Using a drill and a proper screwhead bit, remove the screws around the edges of the frame. When all the screws are out, remove the onetime window and frame. Petrucci's window featured an aluminum frame and came out of the wall in one complete slice. It should be noted that all-welded windows are easier to remove than classic double-hung manner windows, or other paneled wooden windows.
Next, scrape off all the former putty record from the opening. Clean the opening thoroughly and caulk or apply insulation to fill the old holes.
Patching the Wall
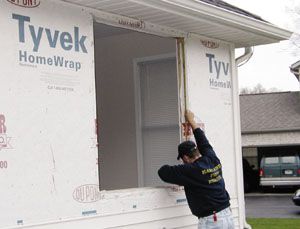
With the window out, you're left with a large, foursquare pigsty in the wall. To seal this area, you'll demand to build what is in effect a small wall within a wall. Begin by measuring the height of the opening from the header to the sill plate. Install jack studs cut to fit inside each side of the window opening, affluent with the trimmer studs that frame the right- and left-hand side of the opening. Fasten all the framing components with 16d nails.
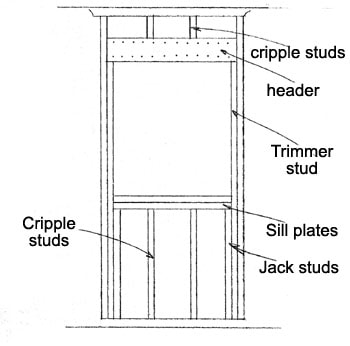
Go on framing the opening with studs spaced 16 inches on heart. However, the studs should be laid out and then the capsule panels break at mid stud. This allows you to spike the edge of the panel directly over the stud, providing a solid nailing surface for the seams. To practise so will likely require that the 2d stud be positioned less than 16 inches from the edge of the framed opening (or jack stud). Brand certain all studs are plumb and square.
Every bit you progress, measure between each new stud and cut blocking to fit flush betwixt the studs and flush with the lesser sill plate. Besides, install similar blocking between the studs along the pinnacle of the frame, flush with the header or height plate.
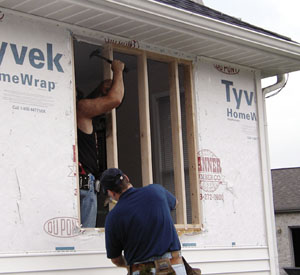
With the wall framing plumb, square and blocked, it'due south fourth dimension to sheathe it. Cut sheathing panels to fit the rough opening. When attaching the sheathing, in this case 1/2-inch OSB panels, exit a ane/viii-inch gap between the long edges of the panel and a 1/sixteen-inch gap where panel ends encounter. This allows room for the panel'due south natural expansion. Use 6d nails for panel thickness of 1/2 inch or less and 8d nails for panels thicker than 1/2 inch. Nail through the panel and into the studs, all the manner around the console. Infinite the nails half dozen inches on center around the exterior edge of the console. Infinite nails 12 inches on center on the interior of the console.
Always work from ane stop of the sheathing to the other. Never nail all four corners of a panel earlier nailing the interior because this can result in bulges.
The next step involves installing a moisture barrier over the capsule. Basically, this ways putting tar newspaper or approved housewrap on the exterior walls earlier siding is installed. Proper installation is required to make this system piece of work. You must design a drainage plane that keeps h2o out. The purpose of sheathing paper is to prevent drafts and the entry of wind-driven rain into the wall cavity. When water penetrates the siding, it must have a clear path to follow downward.
Begin past hanging the kickoff sheet of wrap from the top of the opening. Secure the wrap every few feet with plastic-capped nails. Install the paper so that all water is directed outward. Information technology helps if whatever paper above the patched opening overlaps the newly installed building paper. And, brand sure the lesser of the "patch" paper overlaps the original edifice paper beneath it. Tape all seams in the barrier.

Re-siding the Business firm
When information technology'due south fourth dimension to reinstall the siding, proceed in heed the following guidelines from the Vinyl Siding Institute:
1. Installed panels must motion freely from side to side.
2. When installing a siding panel, push upwardly from the bottom until the lock is fully engaged with the piece below information technology. Without stretching the console, reach up and fasten information technology into place.
3. Fasten nails or other fasteners in the centre of the nailing slot.
4. Practice not forcefulness the panels up or down when fastening in position.
5. Practise not drive the head of the fastener tightly confronting the siding nail hem. Permit one/32 inch (about the thickness of a dime) clearance between the fastener head and the siding console. Drive fasteners straight and level to prevent baloney and buckling of the console.
6. Leave a minimum of 1/4 inch clearance at all openings and stops to allow for normal expansion and contraction. When installing in temperatures below 40 degrees, increase minimum clearance to iii/8 inch.
7. Do non caulk the panels where they run into the receiver of inside corners, outside corners or J-trim. Exercise not caulk the overlap joints.
8. Do not face-nail or staple through the siding. Vinyl siding expands and contracts with exterior temperature changes. Face up-nailing can result in ripples in the siding.
9. When residing, furring or removal of uneven original siding may exist necessary.
ten. The installation of specific products may differ in details from brand to make. Ever follow the manufacturer's instructions, using parts specified by the manufacturer, to ensure proper installation.
Finishing Up
On the within of the house, a gaping hole remains on the opposite side of the new wall. Petrucci and his crew installed insulation between the studs and covered the studs with drywall panels cutting to fit the opening.
Cutting and hanging drywall is a fairly easy chore. Space the wall fasteners well-nigh 16 inches apart. ane 3/8-inch drywall screws are recommended for 1/2-inch-thick drywall. Cover the seams in mesh drywall tape.
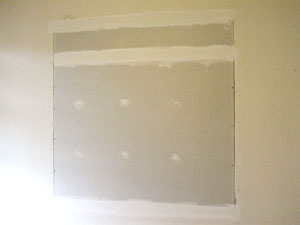
"Finishing the drywall was one of the toughest parts of the project," says Petrucci. "It was tough getting the new drywall to alloy evenly with the rest of the wall." Mudding drywall seams can indeed require a picayune finesse. Apply drywall chemical compound over the fasteners and into the taped seams, spreading it evenly against the wall surface with a putty knife and feathering information technology abroad from the seams. Permit the compound to dry completely before sanding and applying additional coats.
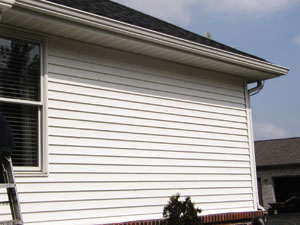
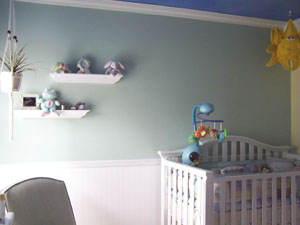
One time the last coat of drywall compound had dried and been sanded, Petrucci completed the project with primer, ii tones of paint and a chair rail. And voila! He had a single-window room with ameliorate insulation from cold temperatures — and a great new nursery for the newest member of the Petrucci family.
Source: https://extremehowto.com/from-window-to-wall/
Posted by: woodsjustat1950.blogspot.com
0 Response to "How To Remove Window And Replace With Wall"
Post a Comment